Nordic hamstring curls are one of the most potent—and toughest—bodyweight exercises out there for building hamstring strength and keeping injuries at bay. The real magic happens during the eccentric part of the movement, where your hamstring muscles are lengthening under a massive amount of tension. This is precisely what builds resilience against the kind of forces your legs handle during sprinting and quick stops, which is why Nordics have become a non-negotiable in serious athletic programs.
Why This Exercise Is an Athlete's Secret Weapon
Let’s be real: the first time you see someone do a proper Nordic hamstring curl, it looks absolutely brutal. There's a good reason this demanding move has earned its reputation. It's not just another gym fad; it's a proven method for building genuinely bulletproof hamstrings.
Understanding the "why" behind the exercise is what changes it from a grueling chore into a strategic tool in your training arsenal. It all comes down to its intense focus on eccentric strength—your muscle's ability to lengthen while under load. Think of it as hitting the brakes on your own body.
From Old-School Obscurity to Elite Training Staple
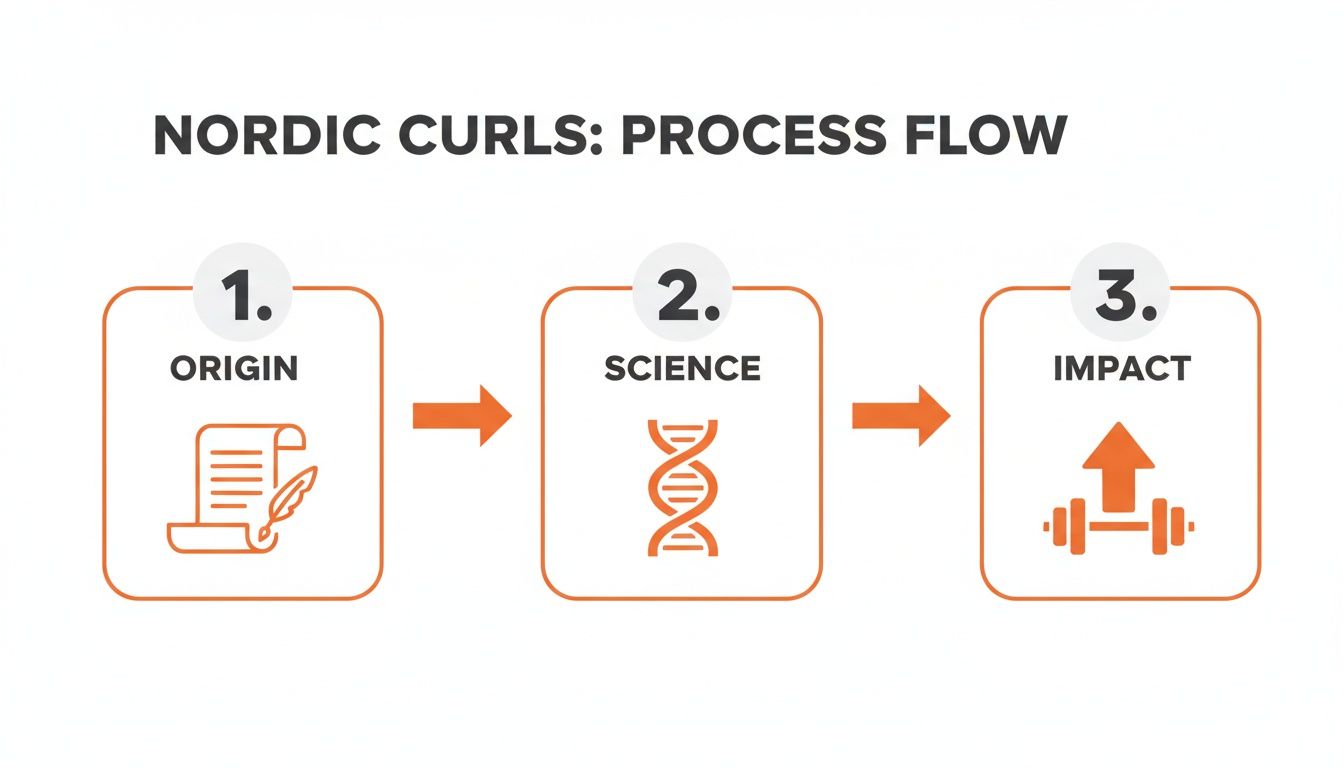
While it might seem like a modern sports science discovery, the Nordic curl is anything but new. The principles behind it actually date all the way back to the 1880s. Its value was really cemented, though, in a landmark 2004 study on soccer players. That research showed that the Nordic Hamstring Exercise (NHE) was far more effective at building eccentric hamstring strength than traditional machine curls. You can dive into the foundational findings on the NCBI website.
That study helped catapult the exercise from a little-known technique into the mainstream. Now, you’ll find it in the training plans of pro athletes everywhere, from the soccer pitch to the football field and the track. The reason is simple: stronger hamstrings lead to more explosive power and a much lower risk of a season-ending injury.
The real benefit of the Nordic curl isn't just about building bigger muscles. It’s about teaching the hamstrings to absorb and control incredible forces, which is the key to preventing the common strains that sideline so many athletes.
The Science Behind Eccentric Overload
So, what’s so special about that eccentric phase? When you sprint, jump, or cut, your hamstrings are working overtime to slow down your lower leg. Most hamstring injuries happen right then, during that lengthening phase when the force is just too much for the muscle to handle.
Nordic curls prepare your hamstrings for these exact high-stress situations by overloading that specific motion. Here’s a quick breakdown of what’s happening:
- Longer Muscle Fibers: Research shows that eccentric training can actually increase the length of muscle fascicles. This makes your hamstrings physically more resistant to damage during explosive movements.
- Smarter Muscles: The exercise improves how your nervous system fires up your hamstring muscles, leading to better coordination and power.
- Serious Strength Gains: You can generate significantly more force eccentrically (lengthening) than you can concentrically (shortening). This leads to greater overall strength development.
Ultimately, when you take on this challenge, you're doing more than just another leg exercise. You're proactively conditioning your body to handle the demands of your sport, building a foundation of strength that pays off in both performance and durability.
Nailing the Nordic Hamstring Curl
Getting your form right on the Nordic hamstring curl isn’t just a suggestion—it's everything. It's the difference between building bulletproof hamstrings and sidelining yourself with an injury. Let's walk through it, cue by cue, so you can execute every rep with precision.
First things first, you need to lock your ankles down. This is your anchor, and if it's not rock-solid, the rest of the movement will crumble. You’ve got a few good options here:
- Buddy Up: The old-school method is still one of the best. Have a training partner kneel behind you and use their body weight to pin your ankles firmly to the floor.
- Use a Barbell: You can slide your heels under a heavily loaded barbell. Just be sure to roll up a mat or use a pad to cushion your ankles—that steel can be unforgiving.
- Find the Right Machine: Many gyms now have dedicated Glute-Ham Raise (GHR) machines or specific Nordic curl stations. These are fantastic because they provide a stable, comfortable setup.
Once you're anchored, get on a soft pad or mat to protect your knees. Start in an upright position, creating one long, straight line from your knees all the way up to your head.
Mastering the Eccentric Phase
The real magic of the Nordic happens on the way down—the eccentric, or lowering, part of the movement. This is where you forge that incredible strength and resilience in your hamstrings. The goal is simple but brutal: lower your torso toward the floor as slowly as you possibly can, using only your hamstrings to fight gravity.
Think of your body as a rigid plank. Before you even start to descend, squeeze your glutes hard and brace your core. This is a non-negotiable cue. Firing up your glutes keeps your hips from breaking forward, which would instantly turn the exercise into a hip hinge and let your hamstrings off the hook.
Keep that straight line from your knees to your head locked in for the entire descent. The moment your hips sag and your lower back arches, you've lost the primary benefit. It's all about control.
Lean forward slowly, resisting the pull of gravity with every fiber of your hamstrings. At some point, you'll hit a "breaking point" where you can no longer control the descent. When you get there, don't just collapse. Catch yourself with your hands like you're doing a push-up.
This simple movement has evolved from a basic concept to a scientifically-backed tool for improving athletic performance and reducing injury risk.
The exercise isn't just about moving weight; it's a proven method for strengthening the hamstrings right where they're most vulnerable.
Common Mistakes and How to Fix Them
Even with the best intentions, it's easy for form to slip. The most common mistake by far is arching the lower back. This is a tell-tale sign that your hamstrings have checked out and your spine is taking on a load it wasn't designed for.
To fix this, you have to get aggressive with your core brace. Right before you lower yourself, take a deep breath and tighten your abs as if you’re about to take a punch to the stomach. This creates the torso rigidity you need to protect your spine and force your hamstrings to do their job. Building this muscle memory from day one will make your Nordics safer and a whole lot more effective.
How to Go From Zero to Pro with Nordic Curls
Let's be real: almost nobody can do a perfect, controlled Nordic hamstring curl on their first try. If you can, you’re in a very small minority. This exercise is brutally effective precisely because it’s so demanding.
The secret isn’t just about being strong; it's about progressing intelligently. You have to park your ego at the door and meet your hamstrings where they are right now. Forgetting this is the fastest way to get frustrated or, worse, injured.
Starting Your Nordic Journey
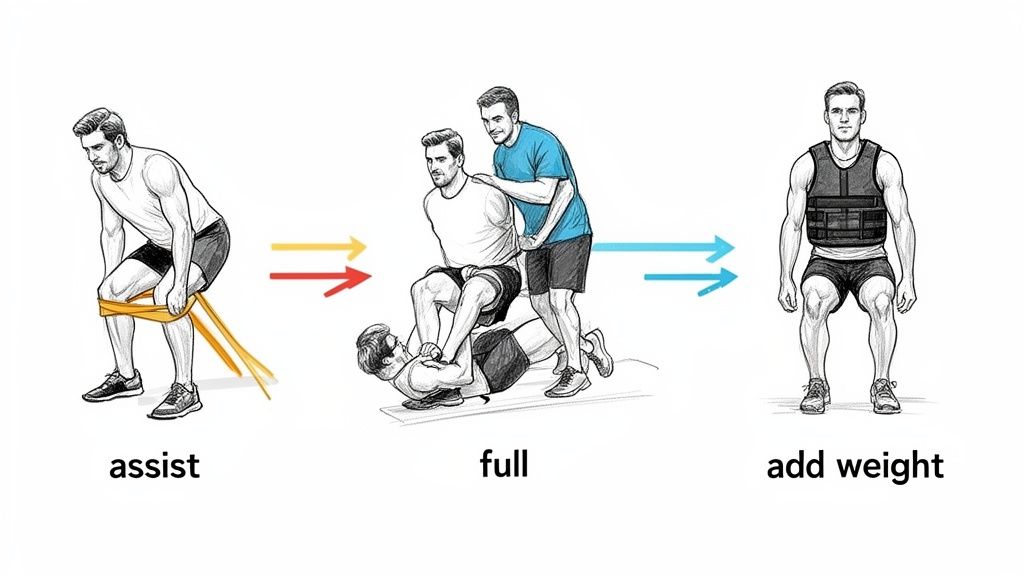
If you're brand new to Nordics, your only job is to control the very first part of the movement. Don't even think about getting close to the floor. The name of the game is building foundational strength and teaching your body to handle this unique eccentric load.
This is where the band-assisted Nordic curl becomes your best friend. Just loop a sturdy resistance band around a squat rack in front of you and position it across your chest. The band gives you the most help at the bottom—the hardest part—allowing you to control the descent and providing a little boost on the way up.
Here’s a practical way to think about your first few weeks:
- Step 1: Grab a heavy band and focus only on a slow, controlled descent for the first few inches. Once you lose control, just catch yourself with your hands. Don't worry about pulling yourself back up.
- Step 2: As that gets easier, switch to a lighter band. Your goal is to gradually increase how far down you can go while maintaining that same slow, deliberate control.
- Step 3: Try it without a band, but only lower yourself to your "sticking point"—the exact moment you feel your form is about to break. Catch yourself there, and push back up.
The number one mistake I see is people rushing the full range of motion. Own the top half of the rep first. Master that control before you even think about going lower.
A Clear Path Forward
To make things even clearer, here’s a simple progression model to follow. Find your current level and work from there. The goal isn't to race through the levels but to master each one before moving on.
Nordic Curl Progression Path
| Level | Exercise Variation | Key Focus | Example Reps/Sets |
|---|---|---|---|
| Beginner | Band-Assisted Nordic | Controlling the top half of the descent | 3 sets of 5-8 reps |
| Intermediate | Eccentric-Only Nordic | Extending controlled range of motion | 3 sets of 4-6 reps |
| Proficient | Full Bodyweight Nordic | Smooth, controlled descent and ascent | 3 sets of 3-5 reps |
| Advanced | Slow-Tempo Nordic | Increasing time under tension (5-sec descent) | 3 sets of 3-5 reps |
| Expert | Weighted Nordic | Adding load with a vest or plate | 3 sets of 3-5 reps |
Each stage builds on the last, ensuring your muscles and connective tissues are ready for the next challenge. Patience here pays off big time in the long run.
Leveling Up to Advanced Variations
Once you can knock out several full-bodyweight Nordics with a slow, controlled tempo, you've earned the right to make them even harder. This is where you can really start forging bulletproof hamstrings. The focus shifts from just doing the rep to making that rep as challenging as possible.
Here are my favorite ways to crank up the intensity:
- Slow It Way Down: The simplest way to add difficulty is to increase the time under tension. Try a 5-second negative. When that feels manageable, go for a 7-second descent. You’ll feel a massive difference.
- Add Some Weight: A weighted vest is perfect for this because it keeps the load balanced. You don't need much—start with just 5-10 lbs and see how it feels. A small plate held against your chest also works well.
- Throw in a Pause: Find your weakest point in the movement (usually about halfway down) and add an isometric hold. Lower yourself to that point, pause for 2-3 seconds, and then continue the rest of the way down. This is fantastic for building strength at tough joint angles.
Following a clear path like this one is the most reliable way to build leg muscle safely. You’re giving your hamstrings a reason to adapt and grow stronger without ever pushing them so far that they break.
How to Program Nordics for Your Goals
Knowing how to do a Nordic hamstring curl is only half the battle. Figuring out where to put them in your training week without wrecking your other lifts? That's the real trick.
This isn't an exercise you can just toss in randomly. Because it's so demanding, Nordics require a "less is more" mindset, especially if you're an athlete. The right approach all comes down to your primary goal. Are you trying to get faster, build bigger hamstrings, or bulletproof yourself against injury? Your sets, reps, and frequency will look completely different for each.
For Speed and Injury Prevention
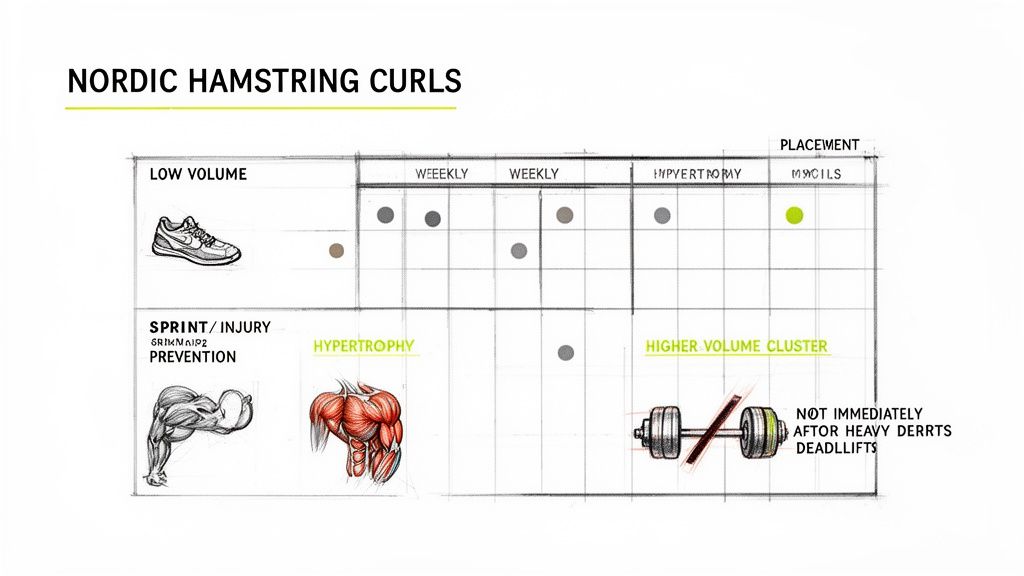
If you’re an athlete, the name of the game is boosting performance without piling on fatigue that hurts your actual sport training. This is where a super low-volume approach to Nordics really works wonders. You don't need to annihilate your hamstrings to get the benefits.
It's almost hard to believe how effective a minimal dose can be. A deep dive into sprint data showed athletes got small but meaningful speed gains—like trimming 0.05 seconds off a 20-meter sprint—from doing just 2 sets of 4 reps once a week. This tiny "micro-dose" beat out higher-volume plans, probably because it builds strength without the crippling soreness. For more on this, you can check out the performance findings on SimpliFaster.
Think about that for a second. Just 8 total reps a week can make you faster and more resilient on the field. It’s the perfect case study for quality over quantity.
Here’s how to put this into practice:
- When to Do Them: Add them to a lower body day. Do them after your main lift (like squats), but before you’re totally gassed.
- How Often: Just once a week is plenty. This gives your nervous system time to fully recover.
- The Sweet Spot: Aim for 2-3 sets of 3-5 reps.
This low-volume plan gives you just enough stimulus to strengthen those hamstring fibers without messing with everything else you need to do.
For Building Bigger Hamstrings
If bigger hamstrings are what you're after, the game plan changes. Building muscle demands more volume and metabolic stress, but you have to be careful. The recovery from Nordics is no joke, and going too hard can leave you walking funny for days.
For hypertrophy, we'll dial up the volume, but strategically. You can hit them twice a week, but make sure you have at least 48-72 hours of rest between those sessions.
A smart way to structure this is to have two different kinds of days:
- Session A (Intensity Day): Go heavy. Do 3-4 sets of 4-6 reps with a tough variation, like a slow-eccentric or a weighted Nordic.
- Session B (Volume Day): Go lighter. Use an easier progression, like the band-assisted version, for 3 sets of 8-10 reps.
This high/low approach pushes for growth while still letting your hamstrings recover. To get this right, it helps to understand the fundamentals of training frequency for hypertrophy so you don't overdo it.
This is a great place to use the Built Workout app. After you log both your heavy and light sessions, you can glance at the muscle recovery tracker. If that heatmap shows your posterior chain is still glowing red, you know you need to give it another day before hitting it hard again. It’s a simple way to avoid the deep fatigue that kills your progress.
Solving the Hamstring Injury Paradox
Here’s a puzzle that keeps sports scientists and coaches up at night. On one hand, Nordic hamstring curls promise incredible injury prevention benefits. On the other hand, hamstring injuries in elite sports are not just common—they're actually on the rise.
How can both of these things be true at the same time?
The disconnect happens when we look at an exercise in a vacuum. Systematic reviews combining 15 different studies confidently report a massive 51% reduction in hamstring strains for teams that consistently perform Nordics. That’s a huge number.
Yet, when we zoom out and look at global soccer data, we see hamstring injuries actually doubled between 2001 and 2022. For a deeper dive into this trend, check out this detailed analysis of hamstring injury trends.
This doesn't mean the exercise is useless. It just means that simply "doing Nordics" isn't a magic bullet that can erase the punishing realities of modern athletics.
Why The Paradox Exists
The problem isn't the Nordic curl itself; it's the context. An athlete's body is an incredibly complex system, and one movement can't single-handedly solve a multifaceted problem. Several real-world factors are at play here:
- Overwhelming Schedules: Professional athletes face absolutely brutal competition schedules with minimal rest. This leads to a level of cumulative fatigue that no single exercise can fix.
- Incomplete Programming: Nordics are fantastic for strengthening the hamstrings through knee flexion. But that’s only half the muscle’s job. A complete program also must include exercises that target the hip extension function.
- Poor Fatigue Management: Too often, athletes perform demanding exercises like Nordics when they're already running on fumes. This can actually increase injury risk instead of reducing it.
An exercise is only as good as the program it sits within. The Nordic hamstring curl is an incredibly potent tool, but it fails when it’s treated as a cure-all instead of one component in a holistic strength and recovery plan.
A Smarter, Holistic Approach
To truly bulletproof the hamstrings, we need to think bigger. A much more effective strategy involves integrating Nordic curls into a broader plan that respects an athlete's total training load.
This means putting a premium on recovery, actively managing fatigue, and strengthening the entire posterior chain—not just one part of the hamstrings.
A balanced approach is critical here. Pairing Nordics with exercises like Romanian Deadlifts, which hammer the hip extension function, provides far more comprehensive protection.
And you can't forget about the muscles that support the hamstrings. If you're serious about building a resilient lower body, you can't neglect the powerhouse next door. Our guide on how to build glutes is a great place to start building that foundational strength.
By managing the full picture, the Nordic curl can finally deliver on its impressive promise.
Got Questions About Nordic Hamstring Curls?
Even with a perfect plan, an exercise as humbling as the Nordic curl is going to bring up some questions. It's a different beast entirely. Let's walk through some of the most common things people run into so you can feel confident and stay on track.
Why Do Nordics Feel Impossible Compared to Machine Curls?
This is the big one. You might be able to leg curl a decent amount of weight at the gym, but then you try a single Nordic and barely move before face-planting. It's a universal experience, and the reason comes down to physics.
A machine curl is a concentric movement, meaning your hamstring is shortening to lift a weight. The Nordic, on the other hand, is all about the supramaximal eccentric contraction. Here, your hamstrings are desperately trying to lengthen under control, acting as the brakes for your entire bodyweight. That eccentric load creates a level of muscular tension that most other exercises can't even touch.
Here’s a good way to think about it: A machine curl is like bicep curling a heavy dumbbell. A Nordic is like trying to slowly lower a refrigerator that's tipping over. The forces are in a completely different league.
Is It Normal to Be This Sore After Doing Them?
Oh, yes. The soreness from your first few Nordic sessions can be legendary. This is a classic case of delayed onset muscle soreness (DOMS), and because the eccentric load is so intense and unfamiliar, it creates more micro-trauma in the muscle fibers. That’s what leads to that "I can't walk right" feeling a day or two later.
But just because it’s normal doesn’t mean you should aim for it. If you're wrecked for three days, you went too hard, too fast. The smart play is to start with a tiny dose—maybe just 2-3 reps of a regression—and give yourself plenty of time to recover. That initial, brutal soreness will fade as your body adapts over the first few weeks. Patience is your best friend here.
Can I Do Nordics If I Have a History of Hamstring Injuries?
Tread very carefully here. For someone with a history of hamstring pulls, the Nordic curl can be an incredible tool for building resilience, but it has to be treated as a rehab exercise, not a strength move. I strongly recommend getting guidance from a physical therapist.
If you're going it alone, the progression must be incredibly gradual:
- Start with isometrics. Just get into position and hold the top part of the movement for time. You're teaching the muscle to activate without lengthening it under load.
- Move to tiny partials. With a heavy band helping you, lower yourself just a few inches and come back up. Stay far away from any hint of pain.
- Progress over months, not weeks. The goal isn't to get a workout; it's to slowly re-introduce load to the tissue so it can heal and remodel itself to be stronger than before.
Never, ever push through sharp pain. This is a slow and deliberate process.
Ready to take the guesswork out of your training and recovery? The Built Workout app visualizes which muscles are recovered and ready for your next session. Download it for free and start training smarter today at https://www.builtworkout.com.