The lateral leg raise is a surprisingly effective, no-equipment-needed exercise that zeros in on your hip abductor muscles, especially the gluteus medius. It's a simple, controlled movement—lifting your leg out to the side while standing or lying down—that plays a huge role in stabilizing your pelvis and preventing injuries.
Why This Simple Exercise Is a Game Changer for Your Hips
Let's be honest, the lateral leg raise often gets pushed to the side. Most people think of it as a physical therapy move, something you only do when you're already hurt, not a staple in a serious strength routine. But what if this humble exercise is the missing piece in your training puzzle, the key to unlocking more power and resilience?
This move is for everyone. I'm talking about elite runners looking to shave seconds off their time and desk workers trying to undo the damage of sitting all day. It’s not just about looks; it's about building a rock-solid foundation of strength in your hip abductors.
The Unsung Hero of Hip Strength
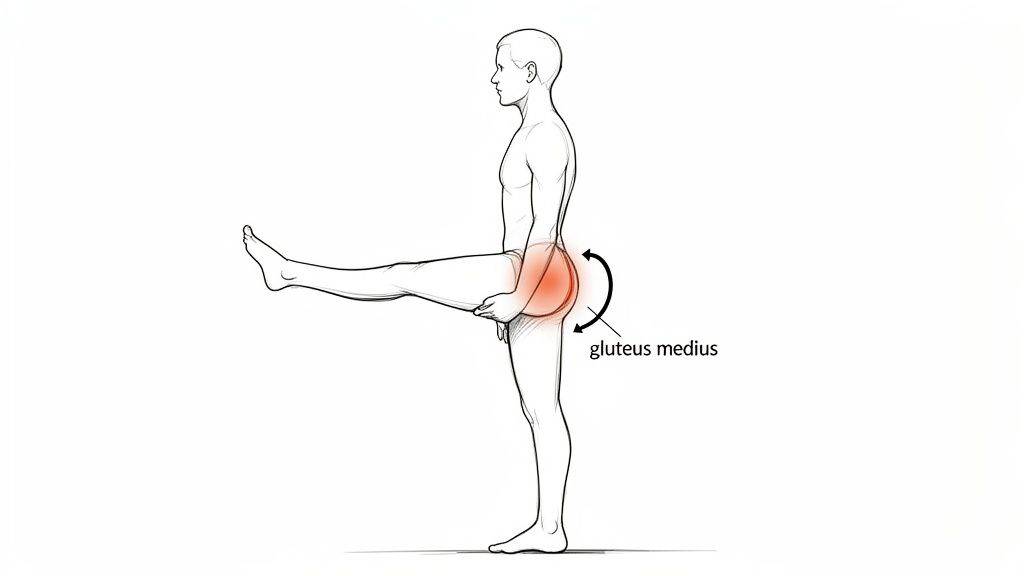
The real star of the show here is the gluteus medius, that fan-shaped muscle sitting on the outside of your hip. When it's weak, a whole mess of problems can pop up—nagging knee pain, a cranky lower back, and even poor balance. But a strong gluteus medius acts as your pelvis's anchor, keeping you stable every time you walk, run, or even just stand on one leg.
By working lateral leg raises into your routine, you're directly strengthening this crucial muscle. This pays off in a few big ways:
- Better Pelvic Stability: It stops your hip from dropping when you're on one leg, which makes your stride more efficient and powerful.
- Lower Injury Risk: Strong hip abductors act like a shield for your knees and lower back, absorbing strain that could otherwise cause problems.
- Boosted Athletic Performance: That newfound hip stability translates directly into more powerful squats, deadlifts, and explosive movements.
More Than Just a Rehab Exercise
The lateral leg raise has proven its power not just in the gym, but in bringing people together. On October 20, 2021, an incredible 850 people performed this exercise at the same time to set a Guinness World Record. The event, organized by Olivia Newton-John's foundation, combined fitness with a great cause, showing how even the simplest movements can build a strong community. You can read more about this inspiring fitness event and its impact.
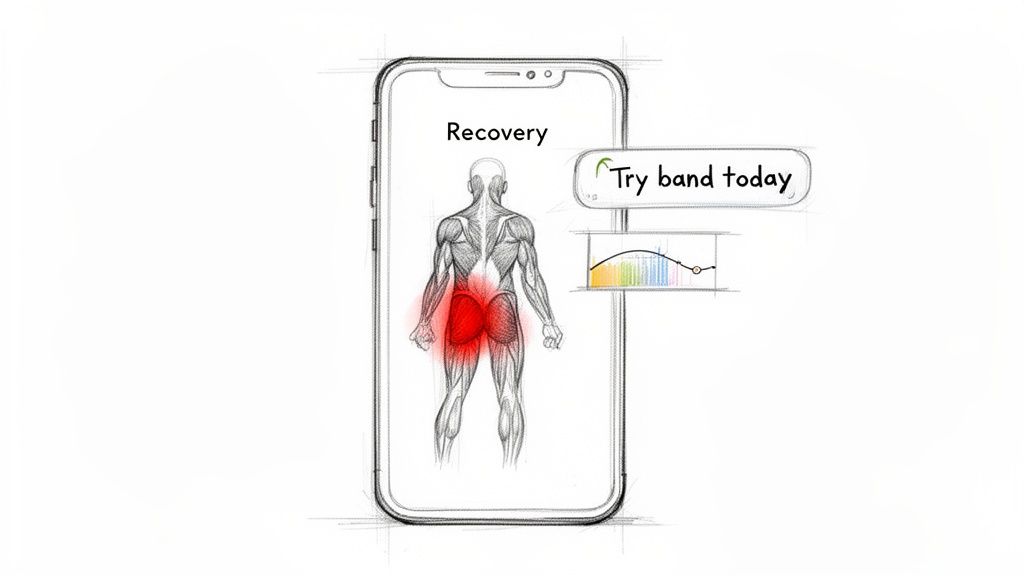
This is where training smart comes in. The image below shows how an app like Built Workout can help you see your progress and recovery, making sure every single rep contributes to real, functional strength.
When you can track your sets, reps, and the impact on your muscles, you get a much clearer picture of your training. This allows you to make better calls on when to push harder and when to ease up. To see how this kind of targeted work fits into the bigger picture of glute development, check out our guide on how to build glutes effectively.
What's Really Happening When You Lift Your Leg?
On the surface, a lateral leg raise looks almost too simple. You lift your leg to the side, and that's it. But beneath the skin, a surprisingly complex team of muscles is coordinating to pull off this seemingly basic move. It’s a classic example of a primary mover working with a whole crew of stabilizers.
The main action here is called hip abduction—the technical term for moving your leg away from your body's centerline. This movement is powered by a group of muscles located on the outside of your hip.
The Key Muscles in Play
The star of the show is, without a doubt, the gluteus medius. This fan-shaped muscle sits right on the outer surface of your pelvis and is the powerhouse behind lifting your leg sideways. Its job doesn't stop there, though. It's also a critical stabilizer for your pelvis.
Think about it: every time you walk, run, or even just stand on one leg, the gluteus medius on your standing leg fires up to keep your other hip from dropping. This is precisely why building a strong gluteus medius is so important for everyday movement and avoiding injury. A stable, efficient gait starts right here.
But it’s not a solo act. The glute med gets help from a few supporting players:
- Gluteus Minimus: Tucked just underneath the gluteus medius, it helps with both abduction and keeping the pelvis steady.
- Tensor Fasciae Latae (TFL): This is a small muscle at the front of your hip that also assists in the lift. Be careful with this one, as it has a tendency to get overactive and take over the show if your glute med is slacking.
- Core Stabilizers: Your abs and obliques have to lock down to keep your torso from rocking. This ensures the work stays where it's supposed to be: in your hip.
When Good Form Goes Bad
This is where the devil is truly in the details. If you get sloppy with your form, the gluteus medius gets cheated out of the work it's supposed to be doing. Your body is smart—it will always look for the path of least resistance. That often means recruiting stronger, more dominant muscles to do the job. It's the number one reason I hear people say they just "don't feel it" in their glutes.
Electromyographic (EMG) studies show exactly how this happens. One piece of research found that during a side-lying lateral leg raise, the anterior hip flexors fired at 54.2% of their maximum potential, while the gluteus medius only hit 32.6%. This muscle-hijacking happens when the leg drifts forward, effectively turning a glute exercise into one dominated by the hip flexors. You can see the full hip abduction research here to get a deeper look at the biomechanics.
This data gives us a crucial takeaway: tiny shifts in your form can completely change which muscles are doing the heavy lifting. Precision isn't just a nice-to-have; it's everything.
This is where having the right feedback loop becomes a game-changer. An app like Built Workout gives you that feedback visually. After a workout, you can check the muscle heatmap. Seeing a bright, high-impact color over your gluteus medius is instant confirmation that you nailed it. But if you see your hip flexors or TFL lighting up instead, you know exactly what you need to fix for next time, making sure every single rep counts.
Nailing Your Form for Maximum Glute Activation
Executing the perfect lateral leg raise isn't about how high you can yank your leg; it’s all about precision, control, and feeling the right muscles fire up. When you get it right, you’re hitting the gluteus medius head-on, building a stable and powerful base for all your bigger lifts. But get sloppy, and you'll just end up working your hip flexors or straining your lower back, completely missing the point.
Let's break down the essential variations and the subtle cues that make all the difference. Think of these as different tools in your toolkit, each serving a unique purpose in building functional hip strength.
The diagram below shows the simple but critical sequence your body follows during a controlled leg lift. It’s a great visual reminder of how intentional movement is the key to hitting your target.
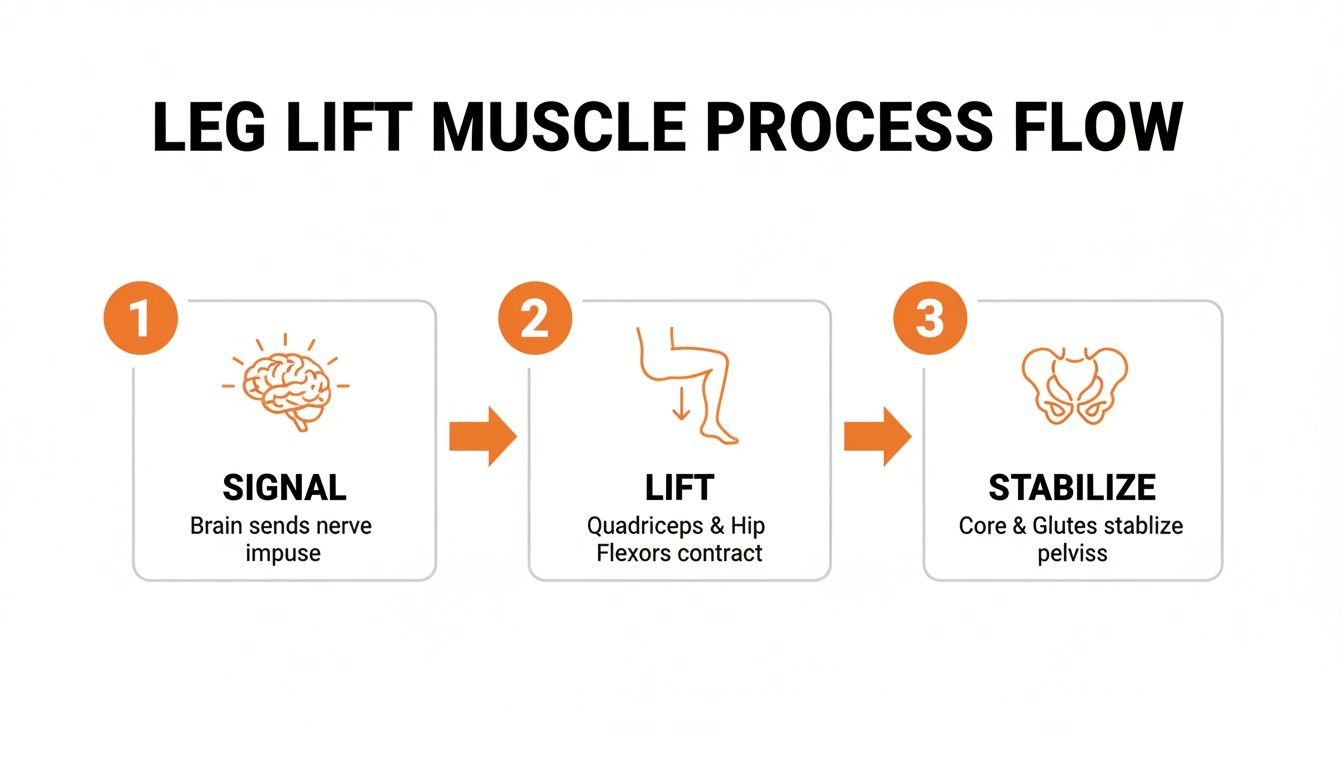
This process really drives home the point that everything starts with the brain's signal and ends with your core locking things down, allowing your glutes to do their job properly.
Side-Lying Leg Raise: The Classic
The side-lying variation is the gold standard for truly isolating the gluteus medius. Because you're supported by the floor, it's much harder for other muscles to jump in and "help," making it the perfect starting point to build a strong mind-muscle connection.
Get set up by lying on your side with your legs stacked and straight. You can cradle your head with your bottom arm or prop yourself up on your elbow—whatever is comfortable. The most important thing is to make sure your hips and shoulders are stacked vertically, creating a perfectly straight line from your head to your heels. Resist the urge to let that top hip roll backward.
Now, brace your core and slowly raise your top leg. Lead with your heel, not your toe. A common mistake is to point the toe up toward the ceiling, which immediately brings the hip flexors into play. Instead, keep your foot parallel to the floor or even think about pointing your toes slightly down. Only lift as high as you can without any movement in your pelvis.
The trip back down is just as important. Don't just let your leg flop down. Control the descent, taking a good two to three seconds to return to the start. That slow, controlled lowering is the eccentric phase, and it’s a powerhouse for building strength.
Standing Leg Raise: Functional Stability
Once you’ve mastered the side-lying raise and can really feel the muscle working, the standing version adds a major balance and stability challenge. This variation is far more functional—it directly mimics the demands of walking, running, and single-leg movements by forcing the gluteus medius of your standing leg to work overtime to keep your pelvis level.
Stand tall, maybe next to a wall or chair you can tap for balance if you need it. Shift your weight onto one leg, keeping a soft, slight bend in that knee. Brace your core tightly to keep your torso from leaning over as you lift.
Without tilting your upper body, lift your other leg straight out to the side. Just like before, lead with the heel and keep the movement slow and deliberate. The goal here isn't height; it's about maintaining rock-solid, level hips throughout the entire motion.
Pro Tip: Imagine you have a glass of water balanced on your head. This little mental cue is surprisingly effective at preventing you from swaying and forces your core and hip stabilizers to do their job.
The Clamshell: Foundational Activation
The clamshell is a fantastic exercise for waking up the glutes. I often program it as part of a warm-up or for beginners who are just learning to feel these muscles engage. It specifically hones in on the external rotators of the hip, which includes the gluteus medius.
Lie on your side with your knees bent at roughly a 90-degree angle, with your feet and hips stacked neatly on top of each other. The key here is to keep your feet glued together throughout the entire movement.
Engage your core, then lift your top knee toward the ceiling without letting your hips roll back. Picture your body as a book, and you're only opening the top cover. The movement should be small, initiated entirely from your glutes, not by rocking your torso back and forth.
This quick guide is a great way to double-check your form and make sure you're not falling into common traps that reduce the exercise's effectiveness.
Common Lateral Leg Raise Mistakes and How to Fix Them
Use this quick reference guide to identify and correct common form errors, ensuring you get the most out of every rep while staying injury-free.
| Common Mistake | Why It Happens | How to Fix It |
|---|---|---|
| Rocking the Torso | The glute medius is too weak to lift the leg, so the body compensates by using momentum and other muscles (like the obliques or QL). | Brace your core firmly before you lift. Reduce the range of motion and only lift as high as you can while keeping your torso perfectly still. |
| Leading with the Toe | This shifts the focus from the gluteus medius to the hip flexors and tensor fasciae latae (TFL), a muscle on the front/side of your hip. | Actively think about leading with your heel. Keep your foot parallel to the floor or even slightly turned down to ensure the side glute is doing the work. |
| Lifting Too High | Eagerness to increase range of motion often leads to the pelvis tilting or the lower back arching to gain extra height. | Focus on quality over quantity. Lift only until you feel a strong contraction in your side glute. Any higher, and you're likely compensating. |
| Letting the Leg Drop | Neglecting the eccentric (lowering) phase misses a huge opportunity for building strength and control. | Control the descent. Make the lowering phase last for 2-3 seconds. This controlled negative builds muscle and reinforces good movement patterns. |
Remember, perfect form is what delivers results. By focusing on these cues, you ensure every rep is a quality one. Apps like Built Workout can be a huge help here, reinforcing good habits by tracking your performance and providing AI-driven feedback that helps you refine your technique for maximum glute activation and injury prevention.
How to Program Leg Raises for Real Results
Getting your form dialed in is half the battle, but knowing how to program the lateral leg raise is what really unlocks its potential. This isn't just about going through the motions; it's about turning a simple exercise into a powerful tool for building stability and strength.
How you program this move depends entirely on what you're trying to achieve. Are you a runner looking to build hip stability for those long miles, or is your main goal to build stronger, more sculpted glutes? Your answer changes the entire approach. The same rules that apply to heavy squats and deadlifts—like sets, reps, and progression—are just as critical here.
Matching Your Programming to Your Goals
Every exercise in your routine should have a purpose. For runners and endurance athletes, the name of the game is muscular stamina and injury prevention. You need your glute medius to fire consistently, mile after mile, without fatiguing. That means training it for endurance with higher reps and controlled movement.
But if you're chasing hypertrophy—that is, building visible muscle size and raw strength—you need to create a lot more tension. This is where adding resistance and working in a lower rep range becomes crucial, forcing the muscle to work harder and adapt by growing stronger.
Here’s a practical breakdown:
- For Stability & Endurance: Think 3 sets of 15-20 reps on each leg. The focus here is on perfect, controlled execution. For most people, just using your bodyweight is plenty to start.
- For Strength & Hypertrophy: Aim for 3-4 sets of 8-12 reps per leg. As soon as you can hit your target reps without your form breaking down, it’s a clear signal that you’re ready for more of a challenge, like adding a resistance band or ankle weights.
I see it all the time: people get stuck doing endless bodyweight reps and then get frustrated when they don't see results. Remember, to build muscle, you have to give it a reason to grow. Progressive overload isn't just a suggestion; it's a requirement.
The Secret Sauce: Progressive Overload
Progressive overload is just a fancy term for making an exercise harder over time. It’s the fundamental principle behind all strength and muscle gains. With the lateral leg raise, it’s pretty simple to apply. Once you’ve mastered the bodyweight version and can hit your rep targets easily, it’s time to level up.
You can introduce these challenges one at a time:
- Add More Reps: The easiest first step is to simply add a few more reps to each set.
- Grab a Resistance Band: A mini-band looped around your ankles or just above your knees adds a surprising amount of difficulty.
- Strap on Ankle Weights: These provide constant tension through the entire lift, which is a game-changer.
- Hit the Cable Machine: Using the ankle cuff attachment on a cable machine gives you smooth, consistent resistance for a serious burn.
This idea of gradually increasing your training volume is the key to growth. For example, a recent study—while it focused on shoulder lateral raises—found that consistently increasing volume led to significant muscle growth. Participants saw a 3.3%-4.6% increase in muscle size over eight weeks just by upping their weekly reps from about 53 to 64. The principle is the same for your glutes. You can get into the science of it by checking out this 2025 study on progressive overload.
This is where smart tracking comes in handy. When you log your workouts in the Built Workout app, the AI Coach analyzes your performance and recovery. It can then give you a heads-up when it’s time to grab a heavier band or add another set, ensuring you’re always pushing just enough to keep the gains coming without overdoing it. For more programming strategies, take a look at our comprehensive guide on how to build leg muscle.
Using Data to Perfect Your Hip Workouts
Knowing the theory and proper form is one thing, but using real data is what separates effective training from just going through the motions. It's how you turn effort into measurable results.
Let’s play out a common scenario. You’ve just wrapped up a tough leg day that included several sets of lateral leg raises. You log everything in the Built Workout app. Now what? This is where you shift from simply exercising to training with intelligence. Instead of just guessing if you did enough or if you even hit the right muscles, you get immediate, visual proof.
From Guesswork to Guarantee with the Muscle Heatmap
Once you open the app, you can pull up your muscle recovery heatmap. This isn’t just a glorified workout log; it’s a living, breathing anatomical map that shows you exactly how your session impacted your body.
Here’s a snapshot of what you might see after your workout.
See that bright red area right over your gluteus medius? That’s not just for show. It’s hard evidence that your form was locked in and you successfully lit up the target muscle. It’s the confirmation you need to know you created enough stimulus to force adaptation and growth.
On the flip side, imagine if your hip flexors were glowing red instead. That’s instant feedback telling you something was off with your technique, giving you a specific cue to fix for your next session.
Let AI Guide Your Next Move
This recovery data is more than just a report card on your last workout—it fuels the AI Coach, turning your past performance into a smart plan for your future progress. The system knows which muscles are cooked and which are ready to go, leading to much smarter workout suggestions.
You might get a notification that looks something like this:
"Your hip abductors have moved from 'Fatigued' to 'Recovered.' Your performance data suggests you're ready for a new challenge. Try adding a medium-resistance band to your lateral leg raise today to increase the stimulus."
This is the real power of a data-driven approach. It takes the guesswork and emotion out of your training. No more wondering if you should push through fatigue or worrying that you’re leaving gains on the table. The AI Coach gives you objective, personalized guidance based on your body’s actual state of readiness.
This helps you dial in the optimal training frequency for hypertrophy by ensuring you're hitting muscles when they’re actually primed for growth, not when they're still trying to recover from the last beating.
Ultimately, this whole process turns your training from a simple list of sets and reps into a powerful feedback loop. You do the work, the app shows you the impact, and the AI uses that information to make your next workout even better. This intelligent cycle ensures you’re always applying the right stress at the right time, paving the way for consistent, injury-free gains in hip strength and stability.
Of course, here is the rewritten section with a more natural, human-expert tone.
Your Lateral Leg Raise Questions, Answered
Even with a seemingly simple exercise like the lateral leg raise, a few common questions always pop up. I hear these all the time from clients, so let's clear them up so you can get the most out of every rep.
How Often Should I Be Doing These?
For building solid strength and stability around your pelvis, a good rule of thumb is to work them in two to three times a week. They fit perfectly into lower body days or even as a light-duty move on active recovery days. The gluteus medius is more of an endurance muscle, so it tends to bounce back quicker than, say, your quads after a heavy squat session.
That said, "listen to your body" is more than just a cliché. It's crucial. I always tell people to get objective feedback if they can. A tool like the Built Workout recovery heatmap is perfect for this—if it shows your hip abductors are still in the red or yellow, that’s your body’s signal to take another day off. Pushing through is just a recipe for overtraining.
Why Am I Feeling This in My Thigh, Not My Glutes?
This is, without a doubt, the most common issue people have. If you're feeling a burn on the front or side of your thigh, it’s a dead giveaway that other muscles are crashing the party. This usually happens for a couple of reasons: either your leg is creeping forward, which brings your hip flexors into play, or you're just lifting way too high and using momentum.
My Pro Tip: The fix is almost always to shrink your range of motion. A smaller, super-controlled lift where you feel the right muscle working is infinitely better than a high, sloppy kick.
To fix it, really concentrate on keeping your lifting leg directly in line with your torso—or even a touch behind it. At the very top of the movement, give that side-glute a hard squeeze before slowly lowering your leg back down with control.
Is It Okay to Do Lateral Leg Raises Every Day?
I wouldn't recommend it. While it’s a low-impact move, you have to remember that muscle growth and strength gains happen when you rest, not when you train. Doing any strength exercise daily robs your muscles of that critical recovery time. Stick to quality sessions two or three times a week for the best results.
The one exception here is using them for activation. A single, light set of 10-15 reps, done with perfect form, can be a fantastic way to "wake up" your glutes before you go for a run or get under the barbell for squats. It just reminds those muscles that they need to show up and do their job.
Tired of guessing about your form and recovery? The muscle heatmap and AI Coach in Built Workout give you the specific feedback you need to train smarter. Download the app and see what a difference data-driven training makes.